Sunday, 28 April 2013
Saturday, 27 April 2013
How to Reset The Ink Level Canon MX328 With Service Mode Tool
Posted on 00:01 by Unknown
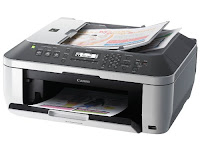 Solution to reset the ink level for Canon MX328, follow the step below :
- Disconnect the power cable
- Connect it while holding down the power button
- With the power button still down, press twice the "Cancel" red button
- Release the power button
- The printes turns into a kind of factory mode...(wait for about 10 seconds, utils it says "Idle")
- Press the ">" (next to the "OK" button) once."Shipping Mode 3"
- Press the "OK" button.
- Press "OK" again for "Without cleaning"
- A test page will print.
- Open the cover, like you are about to change the cartridges.
- Disconnect the power cable again.
- Take out both cartridges.
- Close the cover.
- Connect the power cable once again.
- Turn the printer on.
- Now just put the cartridges back
Canon Pixma MX328 is one of the Inkjet multifuction (Print, Scan, Copy, Fax) printer from Canon. Like general case of printer, after filled by ink usually ink level not full. At some cases of printer, after ink level empty, printer cannot be used to print.
Here the Solution to reset the ink level for Canon Pixma MX328 follow this steps to reset the ink level in your canon MX328.
- Switch off the Canon MX328 and disconnect the power cable.
- While press and hold the power button, Connect the power cable to electric socket.
- While pressing the power button, press the “Cancel” button (red button).
- Now release the power button and the printer turns into a kind of factory mode. Wait for 10 seconds until it says “idle”.
- Press “>” (next button) once “Shipping Mode 3? then Press the “OK” button. Press “OK” again for “without cleaning”.
- A test page will print.
- Open the cover, like you are about to change the cartridges.
- Disconnect the power cable again without switch off the printer.
- Take out the both cartridges.
- Close the cover.
- Connect the power cable and turn on the printer.
- Now just put the cartridges back and the ink level in the canon Pixma MX300 have full again.
For the software you can download link below :
mx328_ServiceModeToolsVersion1.050.exe
Friday, 26 April 2013
Manual Service mode for Printer Canon S6300, i6100, i6500
Posted on 23:55 by Unknown
Service Mode Operations
* With the printer turned off, hold down the RESUME button and press the POWER button (the green indicator lights and the desired service function can be selected).
* While holding down POWER button, let go of the RESUME button and then press the RESUME button twice in succession. Then let go of the RESUME button and POWER. Troubleshooting button. (Each time you press the RESUME button, the indicator’s color toggles between orange and green.
* During printer initialization, the green indicator blinks. When the green indicator stops blinking and remains on, press the RESUME button the stipulated number of times to execute the desired service function listed below. (Each time you press the RESUME button, the indicator’s color toggles between orange and green.)
Button Indicator Function :
* times Lights green Power off (Even if there is no Print Head mounted, the carriage will return to the home position and lock.)
* time Lights orange Service/factory test printout(Including ink sensor check)
* times Lights green EEPROM information printout
* times Lights orange EEPROM initialization (All the information will be reset to the default, but the printer settings will not be affected.)
* times Lights green Clears the waste-ink counter (if you printer getting waste ink problems).
* times Lights orange -Market area (printer) setting. After the power is turned on and a service function is RESUME button the stipulated executed, press the number of times to set the market area setting. Lights green Press the POWER button to return to the service function
* times or more selection mode.
After selecting the service function, press the POWER button. The green indicator lights and the service function will be executed. (After the respective function is executed, the printer returns to the service function selection mode
How to Unclogging Clogged Canon Cartridge
Posted on 23:53 by Unknown
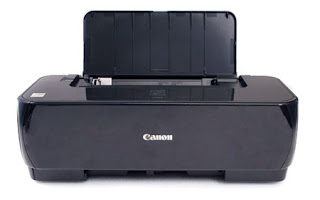
Canon Printers Model :
* Canon i series
* Canon Pixma iP series
* Canon IX series
* Canon MP/MX series
Summary
Usage of compatible ink and leave the printer idle too long may cause printhead clogging. What should you do if you get this problem. Relax,you may recover the printhead by unclogging it.
Follow these steps to unclog the printhead :
- Right click in the printer driver name
- Select Properties menu
- Click Maintenance tab
- Click on Cleaning sign for regular cleaning. Perform this up to 3 times.
- If this does not work, perform Deep Cleaning options
Resetter Canon iP1000, Canon iP1200, Canon iP1300, Canon iP1500, Canon iP1600, Canon 1700,Canon iP2200, Canon iP3000, Canon iP4200, Canon iP5200
Posted on 23:51 by Unknown
Canon PIXMA iP1000, iP1500 Waste Ink Counter Reset
Step 1 : Manual for Service mode
step 2 : Reset Using Software for Permanen
Canon Pixma iP1200, iP1600, iP2200 Resetter
Resetter canon iP 1700 and iP1300
Methode 1 : Reset Hardware
Resetting Ink-Waste Overflow Counter Canon Pixma iP3000, iP4000, iP5000 Printers
Canon Pixma iP4200, iP5200, iP6000, iP8500 Reset Procedure
General Tools software Resetter for Canon PIXMA iP1000
Service Tool Software for Canon Pixma Printer iP1200, iP1600, iP2200
Software Resetter for Canon Pixma iP1300, iP1700
Step 1 : Manual for Service mode
- Unplug power and USB.
- Open door and hold power button.
- Connect power.
- Close door, then release power button.
step 2 : Reset Using Software for Permanen
- Reconnect the printer cable.
- Download
General Tools software Resetter for Canon PIXMA iP1000 Printers
General Tools software Resetter for Canon PIXMA iP1000 Printers
- Run the Software Resetter and select (USB PORT)
- Choose SET DESTINATION 1 And it should be reset.
Canon Pixma iP1200, iP1600, iP2200 Resetter
- Download software for Canon iP1200, iP1600, 2200 Printers.DOWNLOAD Service Tool Software for Canon Pixma Printer iP1200, iP1600, iP2200
- Unzip downloaded file by WinZip, 7Zip, Izarc, etc
- Run GeneralTool.exe
- Select the connected USB port number from USB PORT
- Click LOCK RELEASE, and select the applicable model name in SET DESTINATION
- In CLEAR WASTE INK COUNTER, select MAIN or PLATEN. The selected waste ink counter will be reset. MAIN resets the main waste ink counter, PLATEN resets the platen waste ink counter.
Resetter canon iP 1700 and iP1300
Methode 1 : Reset Hardware
- Turn off Canon Pixma iP1700, iP1300 Printers
- Hold down Resume button and press Power button.
- Keep holding down Power button and let Resume button go.
- Press Resume button 2 times then let BOTH buttons go.
- Green lights will flash and then stop blinking.
- When green lights are solid, press the Resume button 4 times.
- Press the Power button and the Canon Pixma iP1700, iP1300 Printers should turn off, if not, press the Power button once more.
- Your Canon Pixma iP1700, iP1300 Printers should respond as normal
- Download Software Resetter for Canon Printers iP1300 dan iP1700 Software Resetter for Canon Pixma iP1300, iP1700
- Ekstrak/Unrar/Unzip the Software
- Run GeneralTool.exe
- Select USB Port where the canon ip1300 or canon ip1700 installed.
- CLick Lock Release button
- Select EEPROM CLEAR
- Click Test Pattern 1 button
- Your Canon Pixma iP1700, iP1300 Printers should respond as normal.
Resetting Ink-Waste Overflow Counter Canon Pixma iP3000, iP4000, iP5000 Printers
- With the printer plugged in and powered off, press and hold the Resume/Cancel button, then press and hold the Power button. (DO NOT release the buttons. The LED light should be green to indicate that a function is selectable.).
- While holding the Power button, release the Resume/Cancel button. (DO NOT release the Power button.).
- While holding the Power button, press the Resume/Cancel button 2 times, and then release both the Power and Resume/Cancel buttons. (Each time the Resume/Cancel button is pressed, the LED lights alternately in orange and green, starting with orange.).
- When the LED light is green, press the Resume/Cancel button 4 times. (Each time the Resume/Cancel button is pressed, the LED lights alternately in orange and green, starting with orange.).
- Press the Power button. The LED lights in green, and the reset is performed. (When the operation completes, the printer returns to the menu selection mode automatically.).
- Press the power button to exit service mode.
Canon Pixma iP4200, iP5200, iP6000, iP8500 Reset Procedure
- Turn off the Printers.
- Hold Resume button click POWER.
- Hold button RESUME, release POWER
- Then press the button again twice RESUME.
- Release all the buttons.
- Indicator led in green and stay green.
- Click the button 4 times RESUME, if you want to make another transaction.
General Tools software Resetter for Canon PIXMA iP1000
Service Tool Software for Canon Pixma Printer iP1200, iP1600, iP2200
Software Resetter for Canon Pixma iP1300, iP1700
Error Code Canon IP1300, IP1700, IP1200, IP1880, IP1980
Posted on 23:48 by Unknown

Having problem with Canon IP1300, IP1700, IP1200, IP1880, IP1980. Sign that looked to be only led blinking. Following some solutions problem of printer that marked with led blinking.
3x Orange 1x green
Problem : any problem with printer mechanics
Solution :
If you don’t have knowledge about printer mechanic, will better if bring the printer to Canon service center.
4x orange 1x green
Problem : Printer waste ink tank most absorber full
Solution : Reset the printer using generaltools or software resetter. If not work using reset manual. Each printers having different set of manual reset
5x orange 1x green
Problem : Black or Color cartridge trouble.
Note : problem is usually caused many matters, for example chips error, conector is dirty, etc.
7x orange 1x green
Problem : Black or Color cartridge trouble.
Note : problem is usually caused many matters, for example chips error, conector is dirty, etc.
8x orange 1x green
Problem : printer absorber full (Waste Ink Pad Full)
Solution : Reset the printer using generaltools or software resetter. If not work using reset manual. Each printers having different set of manual reset
Reset Methode Instruction Canon MP600
Posted on 23:43 by Unknown
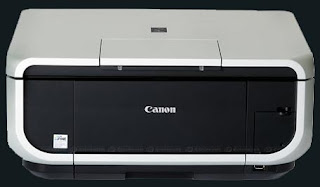 Manual reset waste ink counter pad and reset to factory setting for canon MP600 printer.
Reset Counter MP600
- Turn off the printer
- Press and hold the Resume Button, add a printer an indicator light green.
- Press and hold the Power Button, while hold Power button, release the Resume Button.
- While hold the Power Button, double click Resume button and then Release Both Buttons.
- Click Resume for Four times.
- Once you click Power, to confirm the selected action (reset counter absorber).
- Turn off the printers.
Reset Canon MP600 to the Factory Setting
- Press the HOME button.
- Use the Easy-Scroll Wheel or the right/left arrow to select Settings, and then press OK button.
- Use the Easy-Scroll Wheel or the right/left arrow to select Device settings, then press the OK button.
- Use the Easy-Scroll Wheel (B) or the up/down arrow to select Reset settings, then press the OK button.
- Use the Easy-Scroll wheel or the up/down arrow to select Yes on the confirmation screen and then press OK.
- Press the HOME button to return to the HOME menu.
Manual Reset Method for Canon MP500
Posted on 23:40 by Unknown
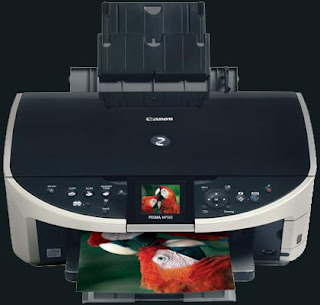 Below the instruction for reset Cartridge Canon MP500 :
- Press and hold STOP/RESET button.
- Press and hold POWER button.
- Release STOP/RESET button without releasing power button.
- Click STOP/RESET two times and then release power button.
- Prepare paper on the paper tray
- Press Stop/reset button for 1 times and then press power button, await till printer finished print.
- Press Stop/reset button for 2 times and then press power button, await till printer finished print again.
- Press Stop/reset button for 3 times then press power button to reset EEPROM.
- Press Stop/reset button for 4 times then press power button to reset Waste Ink Counter.
- Switch off the printer. if printer doesn’t turn off, press button power until printer off.
Free Download Resetter Canon 1980 or Canon iP1900 Series
Posted on 23:38 by Unknown
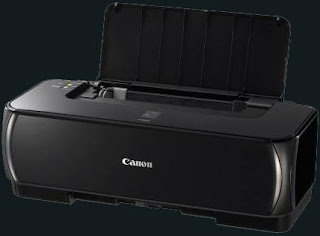 Although software resetter for Canon iP1980 or canon iP1900 series not available now. Doesn’t mean there is no way to reset the printer. To reset Waste Ink Tank canon iP1980 or iP1900 series follow this steps:
1. Press Resume button hold for 1 – 2 minutes
2. Open the cover
3. Release the catridge and then put catridge again
4. Close The Cover
5. Turn Off
6. then Turn On again
Other solution :
Canon Pixma iP 1980 is just a successor of ip1880 parts and manuals are the same but a little bit faster than 1880
- Use General Tool
- Change USB port into Canon port
- Click lock release
- Click ip1800
- Click device id
- Clear waste ink counter by clicking main and platen
- Check Eeprom box
- Click Eeprom dump
- Test pattern 1
- Your done
For download General iP Tool klik link below :
General Tool for Canon Pixma iP 1900 and iP 1980
How to Reset Waste Ink Counter Canon Pixma MP145
Posted on 23:37 by Unknown
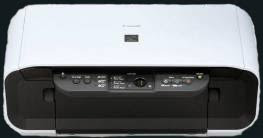 I get from forum but still untried, just sharing for the things requiring reset procedure for Canon Pixma MP145 to reset counter in the Canon Pixma mp145. Following is the procedure to reset waste ink counter Canon Pixma MP145 :
- Connected Printer to a Power source, Turn off the printer if printer on
- With the Printer power off, press the Power button while press and hold Stop/Reset button.
- When the Power led is light, press Stop/Reset button two times while pressing and holding the Power button.
- When releasing the Power button and the Stop/Reset button (regardless of order), the printer will move into a service mode. (Waiting for menu selection)
- When the on/off lights in green, press the Stop/Reset button four times to reset wase ink counter. For other specified number pressed function listed in the table below. (Each time the Stop/Reset button is pressed, the LED lights alternately in orange and green, starting with orange).
- Unplug cable power from a power source.
| The number of the Reset button pressing | LED | Function Remarks |
| 0 time | Green | Power off |
| 1 time | Orange | Service pattern print |
| 2 times | Green | EEPROM print |
| 3 times | Orange | EEPROM reset |
| 4 times | Green | Waste ink counter reset |
How to Reset Canon MPC190 Waste Ink Counter
Posted on 23:35 by Unknown
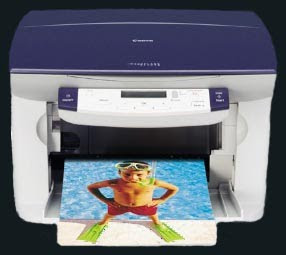 Manual Reset Waste Ink Counter Pad Canon MPC190,
- Enter SERVICE MODE By pressing Menu, Copy, Scan, Copy, Copy
- Select TEST MODE.
- Select 8 PRINTER TEST in TEST MODE.
- Select 3. [EEPROM CLEAR].
- Select 0. [INK COUNT].
- Press the [Set] key.
- Press the [Stop/Reset] key (returning to the state of 3), and then press the [ON/OFF] key.
How to Reset Canon MP800, MP820, MP810, MP830, MP960, MP970
Posted on 23:30 by Unknown
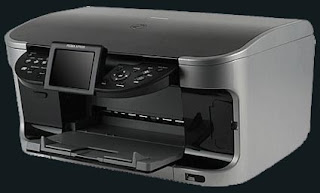 Below the instruction to reset Canon MP800, MP820, MP810, MP830, MP960, MP970
- Start with printer off
- Press and hold resume Button (triangle in the circle) and click “Power” button. green led should be on
- While holding the Power button, release the Resume Button.
- Without releasing the Power Button, click “Resume” button for two times and release Both Buttons.
- Click “Resume” for four times then soon click “Power” button, to confirm the selected action (reset counter absorber).
- Turn off the printer and turn on again
How to Cleaning Clogged Canon Print Heads
Posted on 23:29 by Unknown
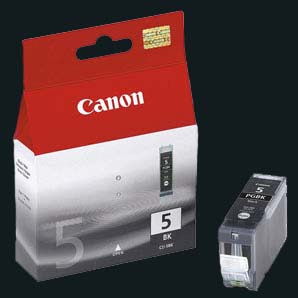
 Canon printers have a removable printer head that holds the ink cartridges. It is important to print a few pages in both black and color at least once per week in order to keep the ink flowing and prevent clogging.
If the printer head nozzles are blocked or dried out you will need to dissolve the dried ink. An inkjet nozzle has a diameter of about 45 microns which is about 1/2 the width of a human hair. Normally you can clear up minor clogs and streaking by running the cleaning cycle found in your printer's software utility.
However if the cleaning cycle doesn't do the trick in clearing up poor and incomplete output, don't give up and assume you'll need to buy a new printer head (which can cost more than a new printer). Canon owners have reported multiple ways to resolve this problem at little or not cost - some of the most popular methods are described below.
Below Steps for Manually Cleaning the Printer Head
Step 1
- Remove the ink tanks and printer head. Remove the ink tanks from the printer head tank holder) and seal them in a zip lock or other sealable plastic bag. Set them aside, preferably propped upright.
- Next remove the printer head (it snaps out). NOTE : You may want to wear latex gloves to help keep ink off your hands.
Step 2
Soak the printer head. There are multiple suggestions on ways to clean the printer head and all have some variation on the following :
- Get a small, shallow pan and lay down a layer or two of paper towels in the bottom of the container to protect the printer head circuitry from contact damage.
- Heat up (via microwave) enough purified/bottled water to cover the paper towels. You can also use a 50/50 mixture of ammonia and distilled water (about a pint will do). Heat the mixture in the microwave for about a minute or so - it should NOT be boiling.
- Slowly pour the water or mixture over the paper towels so that you have approximately 1/2 inch of liquid in the bottom of the pan.
- Set the printer head into the container on top of the towels. You should see ink 'bleeding' out. Move the print head to several different spots (about a minute each spot) and shake gently. This will dissolve the ink clogs.
- If the printer head is badly clogged let it soak for 3 to 4 hours or overnight. You can move it slightly to a different spot every hour or so.
Alternative Soak Method :
Mix a 50/50 solution of warm water and Windex and place in a shallow container, enough to cover the base of the printer head and ink ports. Leave for 2 hours while agitating the unit occasionally. Remove from the mix and lightly scrub the base and internal ink ports with an old soft toothbrush. Do not scrub the gold contacts but don't be concerned if they get wet. Return the unit to the mix for another 2 hours and agitate occasionally. Remove and scrub again as before.
Step 3
Flush the printer head with water.
- Hold the unit under a softly running warm water tap. Place your finger over the tap to create back pressure to allow you to squirt the water into all crevices of the printer head. You should see the gunk build up flow out. Do this until the water runs clear.
Step 4
Dry the printer head and replace.
- Remove the printer head and rinse it thoroughly with distilled water. Shake it dry and set it on folded paper towels to air dry. (Some folks use a hair dryer on a low setting to dry the printer head.)
- Reinsert the printer head and ink tanks. The printer should automatically do a "Printer Head Alignment." If it doesn't, manually perform "Printer Head Alignment" through the printer's utility. Next run a printer head cleaning cycle or two followed by printing a nozzle check pattern to check your progress.
- Repeat as necessary.
Variations on the Above Steps
- Soak the printer head in one of the proprietary solutions (Cartridge Flush, Magic Inkjet Flush) specifically designed to clear print heads. Soak the print head for about 10 minutes to overnight depending on the degree of blockage. It has also been reported that you can clean the print head with an electronic toothbrush and cleaning solution for about 20 seconds with excellent results.
- Use a full eye dropper to flush alcohol through the appropriate ink 'hole(s)' that show inside the printer head unit. Don't rush this: do a drop at a time or you might flood the inside of the unit.
- Purchase an ultrasonic cleaner. Wash the printer head under the water tap to remove excess ink. Load the cleaner with the printer head and water so that the printer head rests lengthways in the cleaner with the electrical contact surface visible. Repeat the cleaning program a few times, using clean water in each program.
Preventive Maintenance
- It's a good idea to regularly conduct preventive maintenance on your inkjet printer to prevent it from developing clogged printer heads. Printer heads become blocked for a number of reasons, but the most common is simply that the ink cartridge and the printer head have dried out.
- Never let the printer stand with an empty cartridge. Either fit a fresh one, or seal the print head unit in a plastic bag with a few drops of water for humidity. Since print heads become clogged when not used for long periods of time, regularly print a page or two to keep the print heads clear. Some experts say that it is better to print one colorful page a week than to run a printer cleaning cycle, because doing so uses a lot less ink. Ideally, printer cleaning cycles should be started once a week to prevent the printer head from getting clogged.
There are other more ink efficient ways to be able to clean printer heads that will prevent their clogging just as effectively as running the printer's cleaning cycle :
- Brush the printer heads with Q-tips soaked in water. Sources vary on whether alcohol would be more effective than water, but in the opinion of some printer experts alcohol can be harmful to printer heads and should thus be avoided.
- Buy a cleaning kit and use it regularly on your printer. A typical cleaning kit usually has a tube of ammonia that you can spray on the printer head to remove dried ink.
- Covering the printer when not in use to keep it free from dirt and debris also helps prevent the printer heads from getting clogged.
Canon Printer Trouble Shooting Guide
Posted on 23:26 by Unknown
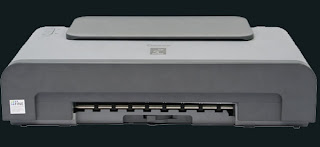
Canon IP 1200, 1300, 1600, 1700, 2200 blinking after the refill Catridge
Solution :
- Press and hold the resume button 10 seconds and click ok on the warning / warning indicator on the computer monitor
Canon IP 1000, IP 1500, I 255, I Series Pixma 320 and pulled the paper is not perfect / incline
Solution :
- This usually happens because of dirt / foreign objects on the paper guide roll / pick-up roll unit, clean the dirt they will draw up the paper perfectly
Canon Maintenance Error / Blinking / Light Power + Resume / Ink + Paper Nyala Alternate
Solution :
- This is caused by the waste ink pad counter sdh full / full so that the printer stops working, do the process of waste ink counter reset by special software such as a general tool / adjustment program.
How to Reset Waste Ink Tank Full Canon BJ F900, F890, F700, F500, S900, S820, S750 and S520
Posted on 23:24 by Unknown
Follow step below to Reset Waste Ink Tank Full Canon BJ F900, F890, F700, F500, S900, S820, S750 and S520
Pressing the RESUME key will select a function; for example, pressing RESUME 4 times will select the clear waste ink counter function. The lamp will alternate color with each key press.
- Turn off the printer.
- Press and hold the RESUME button, then press and hold the POWER button.
- Release the RESUME button, then press and release the RESUME button two more times in succession. (youre still holding the POWER button during this). The printer mechanics will move momentarily.
Pressing the RESUME key will select a function; for example, pressing RESUME 4 times will select the clear waste ink counter function. The lamp will alternate color with each key press.
- service/factory test printout, including ink sensor check
- EEPROM info printout
- EEPROM initialization
- Clear the waste-ink counter
- Printer model setting. (more selections beyond this leave this alone)
Posted in F500, F700, F890, How to Reset Waste Ink Tank Full Canon BJ F900, S750 and S520, S820, S900
|
No comments
How to Reset Waste Ink Tank Full Canon S900, S820, S750 and Canon S520
Posted on 23:22 by Unknown
How to Reset Waste Ink Tank Full Canon S900, S820, S750 and Canon S520, follow this step:
- Turn off the printer.
- Press and hold the RESUME button, then press and hold the POWER button.
- While still holding the POWER button, Release the RESUME button, then press and release the RESUME button two more times in succession.
- The printer mechanics will move momentarily. You are now in Service mode. Release the Power Button.
- Pressing the RESUME key will select a function; for example, pressing RESUME 4 times will select the clear waste ink counter function. The lamp will alternate color with each key press.
- 1. service/factory test printout, including ink sensor check
- 2. EEPROM info printout
- 3. EEPROM initialization
- 4. Clear the waste-ink counter
- 5. Printer model setting. (more selections beyond this- leave this alone)
- 6. After selecting mode, press the POWER button to commit the change, and return to the top of the function selection menu. Pressing the POWER button again turns off the printer for a restart.
Reset Procedure for Canon BJC-5000 and Canon BJC-5100
Posted on 23:21 by Unknown
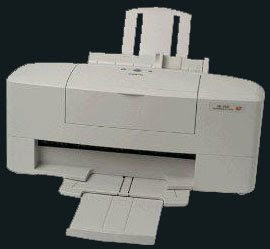 Manual reset procedure for Canon BJC-5000 and Canon BJC-5100. Reset procedure for the both printer be the same, except for fist steps. For canon BJC5100 do following steps before doing reset procedure.
Canon BJC-5100-Self Test
- Switch Printer off
- Hold Power for 1 beep.
- Switch off the printers
- Press and hold RESUME button then press POWER button, The indicator will start blinking.
- While the indicator is blinking, Press RESUME twice then Wait until the printer beeps to indicate service mode
- When the indicator lights steady GREEN, press RESUME button four (4) times. The indicator should be GREEN.
- Press Power to set data
Service Test Print
- Turn off the printer Canon BJC-5000 and BJC-5100
- Press and hold RESUME then press POWER, The indicator will start blinking.
- While the indicator is blinking , Press RESUME twice then Wait until the printer beeps to indicate service mode
- When the indicator lights steady GREEN, press RESUME button two (2) times. The indicator should be GREEN.
- Press the Power button to Print
- Power off printers Canon BJC-5000 and BJC-5100
- Press and POWER, until heard beeps sound from the printer and release.
- While the printer in ON , Press and hold RESUME button until the printer plays a melody of beeps.
Manual Reset Procedure for Printers Canon i850, i950, S600, BJC-1000, BJC-2000, BJC-2100 and S450
Posted on 23:20 by Unknown
Manual Reset Procedure for Printers Canon i850, i950, S600, BJC-1000, BJC-2000, BJC-2100 and S450
Canon i850, i950, S600
Presses light color function Number of presses light color function.
Canon BJC 1000 Series
Canon i850, i950, S600
- Start with the printer OFF
- Hold down RESUME button and then hold down POWERbutton
- Release RESUME button
- Press RESUME twice, then release POWER
- Let green light blink until printer is done futzing
Presses light color function Number of presses light color function.
- presses - green - Test print (or exit service mode on i960)
- press - orange - EEPROM info print (plus grid nozzle diagnostic on i960)
- presses - green - EEPROM initialize
- presses - orange - Reset waste ink counter
- Switch off Canon S450 printer
- Hold Resume button then press and hold POWER button, the beeper will sound once.
- Hold POWER and release RESUME
- Press RESUME twice
- Release Power button
- When the indicator lights steady, press RESUME three(3) times. The indicator should be orange.
- Press Power to set data
Canon BJC 1000 Series
- Remove Cartridge
- Unplug the AC Power Cord
- Hold down the RESUME button
- Release RESUME after plugging in the AC Power cord.
- Press the RESUME once within 5 seconds and release the RESUME.
- Press and HOLD RESUME for two seconds or more and release it.
- Press and HOLD RESUME for two seconds or more and release it.
- Unplug AC Power Cord to set data.
- Remove the Cartridge From Canon BJC-2000 BJC-2100 Printers
- Unplug the AC Power Cord
- Close Front access panel
- Hold down the RESUME/RESET button and plug in the power cable to AC power cord
- Release RESUME/RESET after plugging in the AC Power cord.
- Press the RESUME/RESET once within 5 seconds and release the RESUME/RESET.
- Press and HOLD RESUME/RESET for two seconds or more and release it.
- Press and HOLD RESUME/RESET for two seconds or more and release it.
- Unplug AC Power Cord to set data.
Resetting ERROR E27 Waste Ink Absorber Full Canon PIXMA MP150/MP160
Posted on 23:19 by Unknown
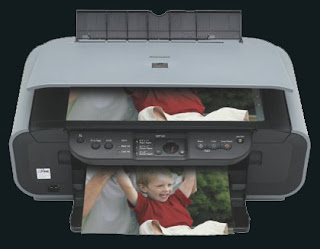 E27 Waste ink absorber full or platen waste ink absorber full Canon PIXMA MP150 Photo All In One Printer.
Take advantage of professional photo printing with a 4800 x 1200 dpi resolution. Canon’s FINE cartridges use minimum 2pl ink droplets. This delivers detailed and vivid prints for all your photos.
Canon PIXMA MP150 Photo All In One Printer Print a photo lab quality 10 x 15 cm borderless photo in approximately 55 seconds in Standard mode. Get fast borderless output from a small credit card size right up to A4. Or use the PIXMA MP150 as a standalone copier delivering up to 22 copies per minute in mono and up to 17 copies per minute in colour.
Canon PIXMA MP160 All-In-One Photo Printer there’s no need to purchase a separate scanner that will take up extra space in your office. Instead, you can rely on this compact unit to scan with a high resolution of up to 600 by 1200 dpi (optical) and 19,200 by 19,200dpi (interpolated). With a 48-bit internal color depth and the capability to deal with documents up to 8.5 x 11.7 inches, the MP160 will give you professional results in minutes.
How to clear E27 Waste ink absorber full
- With the printer powered off but connected to a power source, press the Power button while pressing and holding the Stop/ Reset button.
- When the Power is lit, press the Stop/Reset button two times while pressing and holding the Power button.
- When releasing the Power button and the Stop / Reset button (regardless of order), the printer will move into a service mode. (Waiting for menu selection)
- When the on/off lights in green, press the Stop/Reset button the specified number of time(s) according to the function listed in the table below.
Note : press 4 times for waste ink counter reset.
The number of the Reset button pressing LED Function Remarks :
0 time Green Power off
1 time Orange Service pattern print (auto teste)
2 times Green EEPROM print (dados da EEPROM)
3 times Orange EEPROM reset (EEPROM reset)
4 times Green Waste ink counter reset (Absorvente reset)
5.Turn off the printer.( it must be turn off) then turn it on again.
Canon PIXMA MP750 Error 6A00 E
Posted on 23:18 by Unknown
Error 6A00 on my Canon MP750.
The alarm light was flashing and the LCD message said to "CHECK PRINTER (PRESS [OK])"
Here's what I did (after doing a hundred other things that didn't work):
The alarm light was flashing and the LCD message said to "CHECK PRINTER (PRESS [OK])"
Here's what I did (after doing a hundred other things that didn't work):
- Open the printer as if I was changing an ink cartridge.
- The ink cartridge carriage did not move to the center as it should (one of the symptoms).
- Moved the ink cartridge by hand to the far left to expose the ink purge area at the far right (under the area where the ink cartridge carriage typically parks itself).
- Used a small make-up mirror from my wife and a flashlight to look for paper fragments or anything else that might be jammed around in the ink purge area. The mirror was indispensable for viewing areas I couldn't possibly see otherwise.
- I found a some ink-soaked paper fragments crumbled against a roller near the ink purge.
- Now the fun part. While wearing a head flashlight and viewing the small paper jam in the mirror, I used tweezers and needle nose pliers to extract the paper. It was like "Operation," a game I played as a kid, except every movement I made was backwards because of the mirror. It also required some moves that would challenge a circus contortionist.
- Closed up the printer, hit the okay button, and the printer made some noise like it might work. Unfortunately, the alarm light stayed on. I opened the printer again and noticed that the ink carriage repositioned itself. I took this to be a positive sign as it didn't do this before.
- Closed up the printer again and hit the okay button again. After several "please wait" messages on the LCD, and positive sounding noises from the printer, the alarm light went out and the printer seemed ready to print.
How to Reset Printers Canon MP140, MP160, MP180
Posted on 23:07 by Unknown
Below manual reset methods for Printer Canon MP140, MP160 and MP180
- Start with printer off
- Press and hold resume Button (triangle in the circle) and click “Power” button. green led should be on
- While holding the Power button, release the Resume Button.
- Without releasing the Power Button, click “Resume” button for two times and release Both Buttons.
- Click “Resume” for four times then soon click “Power” button, to confirm the selected action (reset counter absorber).
- Turn off the printer and turn on again
Waste Ink Tank Full Reset Canon MP360
Posted on 23:06 by Unknown
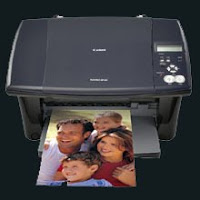 Short Review For Canon MultiPASS MP360
The Canon MultiPASS MP360 Desktop Photo Printer Copier and Scanner delivers exceptional performance and versatility to the home office. Print high quality text and photos quickly copy documents and graphics and easily scan photos and other images all with one compact machine.
By using high intensity color inks and pigment based black ink the MultiPASS MP360 can increase your satisfaction with printing and copying output. It even delivers borderless copies and photos, borderless prints perfect for framing or the scrapbook. Both scanning and copying quality are improved with the use of CCD color scanning technology and a maximum software enhanced resolution of 9600 dpi with 48-bit color depth. Print speed the Canon MultiPASS MP360 up to 18 ppm in black up to 12 ppm in color
Manual Reset Procedure To reset waste ink tank error and reset error code #343
Manual Reset procedure Waste Ink Tank for Canon MP390 and Canon MP360 Just Follow this step to reset waste ink tank full :
- Start with printer on, press aadditional functions, Scan, Copy, Scan. Now you should be in service mode.
- Select Test mode which is like the last available selection
- Select #8 Printer Test, it will do something here like cleaning or something then it will come up with some other option this is where it gets a bit confusing cause now all it says is like 8-2 or 8-3 push the + or – button until it says 8-3 then hit the select button
- The menu will now say EEPROM Clear
- Select Ink count which is option (0) and press set
- Then press Reset Followed by the power button and then wait for it to restart.
Reset Instructions for Canon Printers Using Service Tool/Software Resetter
Posted on 23:01 by Unknown
Generally, Canon resetter programs have similar resetting procedure except for some models. So that successful resetting canon printers using service tool all file attributes of software resetter should not be read only and don’t run the software from CD. There are two version of general tool for canon printer that is with lock release button and do not have Lock Release button.
For resetter with Lock Release button (found inside the executable file)

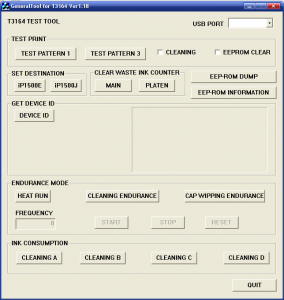
For resetter with Lock Release button (found inside the executable file)

- Run generaltool.exe or the application or executable file.
- Select USB port of the printer to be reset.
- Click lock release button.
- IN Select Destination option, select the printer model.
- In Test Print option, select EEPROM clear.
- Prepare a paper and then click test pattern 1 under Test Print option.
- Turn off the printer and turn on again.

- Run generaltool.exe or the application or executable file.
- Select USB port of the printer to be reset.
- In Select Destination option, select the printer model.
- In Test Print option, select EEPROM clear.
- Prepare a paper and then click test pattern 1 under Test Print option.
- finish it
How to Reset Canon i80 Waste Ink Tank Full
Posted on 23:00 by Unknown
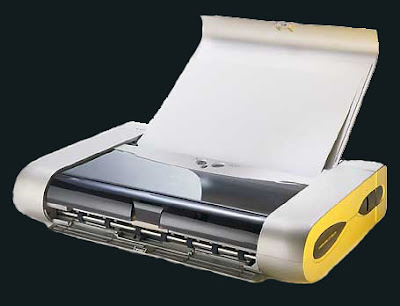 This tutorial to reset waste ink in the printer canon i80. I not yet tried this tutorial, because this tutorial is I get from forum service printer. following step bt step to reset printer Canon i80 :
- Close the print head cover, and turn off the printer.
- While pressing the Resume/Cancel button, press the Power button *.
- While holding the Power button, release the Resume/Cancel button **.
- While holding the Power button, press the Resume/Cancel button three times, and then release the Power and Resume/Cancel buttons ***. During initialization, the LED blinks in green.
- When the LED stops blinking and lights in green, press the Resume/Cancel button the 4 times ***.
- Press the Power button. The LED lights in green, and the selected function is performed. When the operation completes, the printer returns to the menu selection mode automatically.
- Power off the printer and then back on and test.
Note :
- (Do not release the buttons. The LED lights in green to indicate that a function is selectable.)
- (Don’t release the Power button.)
- (Each time the Resume/Cancel button is pressed, the LED lights alternately in either orange or green, starting with orange.)
Canon PIXMA MP800 Error 6A00 Troubleshooting
Posted on 22:59 by Unknown
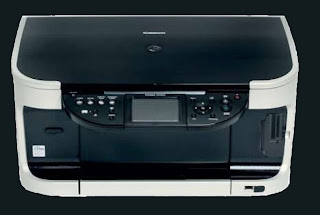 Step by Step troubleshooting canon pixma MP800 error code 6A00
The Problem Canon PIXMA MP800 Error 6A00
- The print head cartridge keeps locking itself up on the right hand side.
- Frequent 5100 errors even when the printer is on standby
- Even when wipe up the print cartridge, the next print will mess up the bottom of the print cartridge with ink again.
- Opening the cover and wait for ink carriage to center
- Pull out power cord
- Pushed carriage to far left (should slide easily)
- Used paper towel and wiped purge unit a lot of times (press down to soak paper towel with ink). Repeat until the paper towel is relatively clear.
- Used diluted napisan (oxygen-based cleaning agent in the ratio of 1:3 with powder:water) and soaked paper towel
- Repeat step 4 with wet paper towel. Repeat until purge unit is near-white.
- Pull and push clear plastic wiper (north of purge unit) and wiped it down
- Slided carriage back to original position
- Removed Print head cartridge and wiped out excess ink stuck on bottom.
How to Fix Error Code U071 Canon Pixma MP830
Posted on 22:56 by Unknown
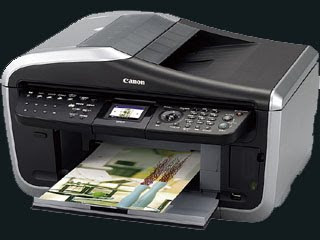 Fix Error Code U071 Canon Pixma MP830 from Canon tech support. “It could be one or more bad ink tanks that are causing this issue. I say this because you mentioned that it is usually the cyan ink tank, but if others are bad, we want to ensure that we take care of those as well.”
For troubleshooting purposes, please perform the following :
- Open the printer and remove all ink tanks.
- Insert a single ink tank in the printer then close the cover.
- Confirm whether the printer recognizes the installed tank properly. If it does, it will indicate it does not detect the other ink tanks, as they are not currently installed in the printer.
- Repeat steps 1-3 with another ink tank.
- If the printer at any time indicates two of the same ink tanks are installed, the cause will be the last tank installed. For example, if you inserted an ink tank earlier, and you later inserted another ink tank, and it said two of the same inks were installed, the cause of the issue is the last ink tank.
Download Canon Printer Service Manual and User's Guide
Posted on 22:55 by Unknown
Here are some manuals and user's :
Download Canon BJ-10sx User Manual
Download Canon BJ-200e User Manual
Download Canon BJ-230 User Manual
Download Canon BJ-30 User Manual
Download Canon BJC-1000 Service Manual
Download Canon BJC-1000 User Manual
Download Canon BJC-2000 Service Manual
Download Canon BJC-2000 User Manual
Download Canon BJC-2100 2100 Simplified Manual
Download Canon BJC-2100 User Manual
Download Canon BJC-2100/2100SP Simplified Manual
Download Canon BJC-250 User Manual
Download Canon BJC-3000 Service Manual
Download Canon BJC-3000 User Manual
Download Canon BJC-4000 User Manual
Download Canon BJC-4200 User Manual
Download Canon BJC-4300 User Manual
Download Canon BJC-4400 Service Manual
Download Canon BJC-4400 User Manual
Download Canon BJC-4550 User Manual
Download Canon BJC-50 Service Manual
Download Canon BJC-5000 Series User Manual
Download Canon BJC-5000 Service Manual
Download Canon BJC-5000, 5100 Parts Manual
Download Canon BJC-5100 User Manual
Download Canon BJC-6000 Series User Manual
Download Canon BJC-6000 Service Manual
Download Canon BJC-6000 Service Manual
Download Canon BJC-610 User Manual
Download Canon BJC-620 User Manual
Download Canon BJC-6200 Service Manual
Download Canon BJC-6500 Service Manual
Download Canon BJC-70 User Manual
Download Canon BJC-7000 User Manual
Download Canon BJC-7100 Service Manual
Download Canon BJC-7100 Service Manual
Download Canon BJC-80 User Manual
Download Canon BJC-8000 User Manual
Download Canon BJC-8200 Service Manual
Download Canon BJC-8200 User Manual
Download Canon BJC-85 Reference Manual
Download Canon BJC-85 User Manual
Download Canon BJC-85/M70 Reference Manual
Download Canon BJC-8500 Service Manual
Download Canon BJC-8500 User Manual
Download Canon CanoScan D1230/D2400 Service Manual
Download Canon CanoScan D660U Getting Started Guide
Download Canon CanoScan D660U Service Manual
Download Canon Canoscan N650U/N1220U Service Manual
Download Canon CLC 10 Service Manual
Download Canon CLC 1120, 1130, 1150 Service Manual
Download Canon Color Laser Copier CLC-10 Service Manual
Download Canon FAU-S11 Service Manual
Download Canon Fax Basic 2000 Service Manual
Download Canon Fax-L900 Parts Manual
Download Canon Faxphone B640 User's Manual
Download Canon FB1210U Service Manual
Download Canon FB330/FB630 Service Manual
Download Canon G3, G4 Error Code List
Download Canon i320 Service Manual (simplified)
Download Canon i450 Service Manual (simplified)
Download Canon i550, i850, i950 Parts Manual
Download Canon i550, i850, i950 Service Manual
Download Canon LBP-1000 Parts Manual
Download Canon LBP-1000 Service Manual
Download Canon LBP-1120 Service Manual
Download Canon LBP-1760 Parts Manual
Download Canon LBP-1760 Service Manual
Download Canon LBP-2000 Parts Manual
Download Canon LBP-2000 Service Manual
Download Canon LBP-2460 Parts Manual
Download Canon LBP-2460 Service Manual
Download Canon LBP-3260 Parts Manual
Download Canon LBP-3260 Service Manual
Download Canon LBP-3260 Training Support Manual
Download Canon LBP-800 Parts Manual
Download Canon LBP-800 Service Manual
Download Canon LBP-8iv Parts Manual
Download Canon LR1 User Manual
Download Canon MP-C545 User Manual
Download Canon MP-C635 User Manual
Download Canon MultiPASS 5500 User's Manual
Download Canon MultiPASS C3000 User's Manual
Download Canon MultiPASS L6000 User's Manual
Download Canon NP 1550 Service Manual
Download Canon NP 6012 Service Manual
Download Canon PC800, 900 Service Manual
Download Canon S 600 Service Manual
Download Canon SmartBase mpc400, 600 Parts Manual
Download Canon SmartBase mpc400f, 600 Service Manual
Reset Manual Procedure for Canon Pixma MP450
Posted on 22:54 by Unknown
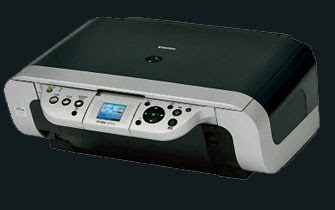 Printer Canon Pixma MP450 is a basic all-in-one printer that delivers great features and performance for the price. Printer Canon Pixma MP450 is inexpensive, offers media card readers, support for infrared and Bluetooth devices, and great print quality.
Follow these steps to manual reset for Canon Pixma MP450 Printers :
- Turn off the Canon Pixma MP450 Printers .
- Hold button Resume/Cancel (red triangle in the circle), click on POWER – an indicator light green.
- Release the button Resume / Cancel keeping POWER.
- Click Resume/Cancel 2 times, keeping POWER, and then release all the buttons.
- When the indicator recorded GREEN – click Resume / Cancel 4 times!
- Turn off the Canon Pixma MP450 Printers POWER button.
How to Reset Canon Pixma iP90
Posted on 22:52 by Unknown
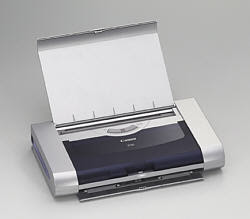 Canon pixma iP90 released almost at the same time with canon Pixma iP 1880. Canon iP90 is printer with single function. Cartidges which used in canon Pixma iP90 is BCI-15BK, BCI-115C dan BCI-16C. Resetting procedure canon iP90 almost the same as manual reset canon iP1880. You can use combination of button in the printer to reset the printer.
Following the step to resetting canon Pixma iP90 :
- Before resetting printer canon iP90, start with printer power off .
- Press resume button coincide with power button.
- While pressing power button, release resume button.
- Press resume button 2 times and then release both button
- Green LED indocator will blinking and then stopped blinking.
- When the Power LED lights in green, press resume button 4 times.
- Press power button and the printer power will off. otherwise off, depress again power button.
- And the turn on the printer again, your printer canon iP90 should be response as normal.
How to Reset Waste Ink Counter Canon Pixma iX5000 and iX4000
Posted on 22:51 by Unknown
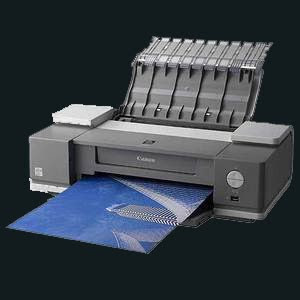 To reset counter Canon PIXMA iX4000 or iX5000 you have to enter to service mode. Follow the step to enter to service mode on Canon PIXMA iX4000 or iX5000 :
- Connect the Canon PIXMA iX5000 or iX4000 printer to the power cord. ( note : If the automatic power-on function is enabled in the printer, the printer enters the service mode for the first time, but it will never enter the service mode if the printer is turned off by the Power button. This is because the printer remains to be turned on internally if the power is turned off by the Power button. To prevent this, disconnection of the power cord is required before starting the printer in the service mode ) .
- With the Canon PIXMA iX5000 or iX4000 printer powered off, while pressing the Resume/Cancel button, press and hold the Power button. (note : Don’t release the buttons. The Power LED lights in green to indicate that a function is selectable.)
- While holding the Power button, release Resume/Cancel button. (Don’t release the Power button.)
- While holding the Power button, press Resume/Cancel button 2 times, and then release both the Power and Resume/Cancel buttons.
- When the Power LED lights in green, press the Resume/Cancel button 4 times to reset waste ink counter in the Canon Pixma iX5000 / iX4000. (note : If the Power LED does not light in green the printer does not enter the service mode, disconnect the power cord and plug it again. Then start from step 1 to start the printer in the service mode again).
- At the end of the service mode, press the Power button. The paper lifting plate of the sheet feed unit will be raised.
- Each time the Resume/Cancel button is pressed, the Alarm and Power LEDs light alternately, Alarm in orange and Power in green, starting with Alarm LED.
Modify Canon PIXMA Into A Professional CD DVD Label Injet Printer
Posted on 22:50 by Unknown
 Why waste money on a CD or DVD label printer when you can easily convert your Canon IP and MP inkjet printers into a CD or DVD lable printer? I stumbled upon this by accident while searching for a professional DVD label printer. I have to admit that this is a cheaper alternative, and a better option too. Basically what you will also need are
- An inexpensive ($16-$20) CD tray (ebay) specific to your Canon printer model
- Canon CD-Labelprint software
- A printable CD/DVD or CD/DVD sticker/label

The tutorials can be found at Steve Digicam’s Forum, the only problem is there are too many discussion and text to go through. A step by step illustration guide with minimal text can be found at instructables.com – Modify Canon Pixma Printer to Print on CDs / DVDs.
Before you proceed with the simple process, do make sure your Canon printer model have this hidden CD/DVD print capability. I purchased my CD/DVD tray last week from eBay and it works.Here are the list of models compatible with the CD/DVD printing Tray:
Canon iP3000
Canon iP4000
Canon iP4200
Canon iP4300
Canon iP4500
Canon iP5000
Canon iP5200
Canon iP5300
Canon iP6000
Canon iP6000D
Canon iP6600/D
Canon iP6700D
Canon iP8500
Canon Pro9000
Canon Pro9500
Canon MP500
Canon MP530
Canon MP600
Canon MP610
Canon MP750
Canon MP760
Canon MP780
Canon MP800
Canon MP810
Canon MP830
Canon MP950
Canon MP960
Canon MP970
Troubleshooting on Printer Canon MP530
Posted on 22:49 by Unknown
Canon released the PIXMA MP530 as an all-in-one home printing appliance. The device can handle most small office duties, including printing, faxing and scanning, and is ideal for individuals who have limited desk space for multiple appliances. The device may occasionally malfunction, but you can troubleshoot it.
Follow the instruction :
Follow the instruction :
- Verify that the MP530 is connected to a power source. The power cable should be plugged into the slot on the right side of the back panel and the "ON/OFF" button on the front panel should be pressed.
- Check that you've connected the MP530 to all relevant external devices if the machine isn't responding to the external device or if you're getting a data error displayed on the MP530's screen. If using it as a fax machine, connect the telephone line to the telephone jack on the left side of the back panel. If using the device as a scanner, connect it to your computer using its USB cable.
- Make sure you've installed the MP530's drivers on your computer if your computer cannot communicate with the appliance. Insert its included installation disk into your Windows or Mac computer. The CD will automatically launch an installation program on a Windows PC; press "Easy Install" and follow the on-screen prompts. On a Mac, double-click the CD icon on your desktop and select "Setup" in the window.
- Align the MP530's printing head if your printing results look skewed or crooked. Insert five A4-sized sheets of plain paper into the printer's back sheet feeder. Press the arrow keys on the printer's front display until it reads "Auto Head Align." Press "OK" and the printer will automatically print test sheets and align its own printer head.
- Contact Canon's technical support line toll-free at 800-652-2666 if you still cannot get the MP530 to function properly. Your printer may need servicing due to a hardware malfunction. The support representative can provide further information on servicing and the locations of regional service centers.
How to Double Side Printing on Printer Canon MX300
Posted on 22:48 by Unknown
The Canon Pixma MX300 office all-in-one printer features the ability to print in black and white or color. It can make copies of documents, scan and connect to a computer through a USB cord. The printer also has the option to create a double-sided print job, which allow users to save paper by printing a large document onto the front and back of the paper. When performing a two-sided print job, the printer will print every front side page in a stack and then the user must manually flip the stack of paper for the backside to be printed on.
follow the step bellow :
follow the step bellow :
- Open the Canon MX300 dialog box when you're ready to print. This dialog box should appear after you select the "Print" option from the application from which you are printing.
- Click the "Properties" option from the print dialog box, and then click the "Page Setup" tab. Select the printing type the meets your preferences from the "Printing Type" section.
- Click the box next to the "Duplex Printing" field so that it's selected. Click on the drop-down menu next to the "Staple Side" field to determine the side of the page you'd want a staple to be placed.
- Click "OK" when you're ready to print. The first side of the paper will be printed, and then a prompt will appear on your computer screen telling you to remove the paper.
- Turn the paper around as instruction from the dialog box, and then click "OK." The print job will then finish printing on the opposite side.
Canon Pixma MP800 Troubleshooting Guide
Posted on 22:47 by Unknown
Canon designed the PIXMA MP800 as an all-in-one printer, copier and scanner. It appeals to the home user who needs these office services but is limited for desk space. Even the best Canon printer can stop working. Troubleshoot your PIXMA MP800 to help find and fix common underlying problems that may affect the printer's performance.
Canon Pixma MP800 Troubleshooting Guide
Canon Pixma MP800 Troubleshooting Guide
- Make sure the MP800 is plugged into a reliable power source-for the best results, plug it directly into an outlet instead of using an extension cable--and powered on if its front display panel is dark.
- Check the front and back paper feeder slots if the MP800 makes strange noises or stops printing halfway through a printing job. The device may be clogged. Remove any pieces of paper that may be stuck.
- Review the front LCD display screen for an error. The error message typically describes what's wrong and how to fix it.
- Adjust the MP800's print head if your printer results look crooked or off-balance. Press the "On/Off" button to turn off the device, then turn it back on. Insert two A4-sized (letter size) sheets of plain paper into the MP800's top feeder slot. Press "Maintenance" on the MP800's display screen and use the arrow keys to scroll down to "Manual Head Align." Push "OK" and follow the on-screen prompts to complete the alignment process.
- Clean the MP800's scanner bed if the LCD screen displays an error saying, "Cannot Obtain Clean Scan" or if your scanning results look streaked, splotched or obscured by debris. Canon recommends wiping the glass with a clean, lint-free cloth. Solid debris deposits can be removed with water. Don't use glass cleaners, as this may damage the MP800.
- Dial the Canon printer support line at 800-652-2666 if you still can't get your PIXMA MP800 printer to work correctly.
How to Install Printer Canon iP1600 Without CD Driver
Posted on 22:46 by Unknown
If you've lost the installation CD for your Canon iP1600 and want to install it on another computer, you can obtain a driver from Canon that allows the installation process to take place without the original disc. While the original installation CD is still the easiest way to install a printer, it is no longer necessary for the device to work properly. Drivers for all models of Canon printers are available at the Canon website.
Follow the steps below :
Follow the steps below :
- Open a website browser and navigate to the Canon website (Canon.com). Once you've loaded the main page, click the "Downloads" tab at the top of the screen.
- Click on the "Printers" tab and find the Canon iP600 printer on the menu. Select the link for the driver from the menu.
- Click the "Download" button from the next screen. Follow the instructions to start the download process. The instructions will appear on screen in a series of pop-up boxes. After reading the information in each window, click the "Next" button at the bottom of the window.
- Choose what computer drive you would like the printer to be installed to and click the "Install" button. The download should take only a few minutes to complete. With the driver installed, the printer should work properly. Print a test page of any document to make sure it is working normally.
How to Load Canon MultiPASS 360 With Ink Cartridges
Posted on 22:45 by Unknown
The Canon MultiPASS 360 is an ink jet printer. The ink cartridges travel in a carriage, which moves from side to side inside the machine as the ink is sprayed on pieces of paper. When you first set up the MultiPASS 360, you will need to install the ink cartridges in the carriage. Loading the ink cartridges is a simple process that should only take a few moments.
Follow the step for instruction :
Follow the step for instruction :
- Turn on the MultiPASS 360. Open the top cover of the printer until it clicks. The front cover of the printer will fall open by itself.
- Open the inner cover, which was behind the now-open front cover. The ink cartridge carriage will move to the far left of the machine.
- Take the new ink cartridges out of their packaging. Remember to remove the plastic caps from the cartridges. Place the ink cartridges into the empty slots, snapping down the side nearest you first.
- Close the printer's inner door and top cover. The printer will display a message on the LCD screen, asking if you replaced ink cartridges. Press the arrow buttons until "Yes" is selected. The printer will then ask which ink cartridge you replaced. Select "Yes" or "No" with the arrows to specify what ink cartridges you replaced.
How to Reset the Chip on CLI-8BK Ink Cartridge
Posted on 22:43 by Unknown
Certain Canon print cartridges are outfitted with a microchip that lets the printer and Canon software on the computer know if the ink cartridge has come directly from Canon or has been refilled. If the cartridge has been used before, the printer will not work until a new Canon print cartridge is installed. To save money, some people either refill print cartridges themselves or they buy refilled cartridges online. There is a way to reset the microchip for a CLi-8BK Canon ink cartridge so it will work in the printer
Resetting the Chip
Resetting the Chip
- Purchase a Canon chip resetter, which is available through some online ink cartridge refill stores.
- Remove the refilled or aftermarket Canon CLi-8BK cartridge from its packaging.
- Place the ink cartridge on the chip resetter. Make sure the chip end on the bottom of the cartridge is pressed up against the resetter's pins to make a connection.
- Wait for the LED light on the ink cartridge to blink once, then light up solidly. This means the chip on the ink cartridge has been reset and it will now work in the printer.
- Turn on the printer and open the access door. Remove the old cartridge and install the new cartridge. Close the printer door and begin using the printer
How to Bypass the Microchips on Canon Inkjet Cartridges
Posted on 22:42 by Unknown
Certain Canon printer models have a microchip that tells the printer how much ink is left in the cartridge as well as if the cartridge came directly from Canon. If you are using a refilled or aftermarket cartridge in a Canon printer, the ink monitoring software will block the use of the cartridge. There is, however, a way to get around the monitoring software.
Follow the instruction below :
Follow the instruction below :
- Turn on your Canon printer and wait for the warm-up process to complete. Open the printer's access door and wait for the cartridge carriage to come to a complete stop.
- Remove the cartridge to be replaced and insert the refilled or aftermarket cartridge. Close the printer's access door.
- Wait for the printer to detect the new cartridge. An error message will come up on the screen to say the printer cannot detect the ink level on the new cartridge.
- Click on "Yes" to indicate that you want to use the new cartridge despite the risk of damage to the printer if the cartridge leaks.
- Click on "Yes" one more time to acknowledge that you understand Canon will not be responsible for damage done to the printer by the new cartridge.
- Press and hold the "Resume" button on the printer for at least five seconds. The "Resume" button will be flashing. If your printer does not have the "Resume" button, press and hold the "Ok" or "Cancel" button.
- Use the printer as normal, keeping in mind the ink monitoring software will not show the ink level for the new cartridge.
Subscribe to:
Comments (Atom)


